|
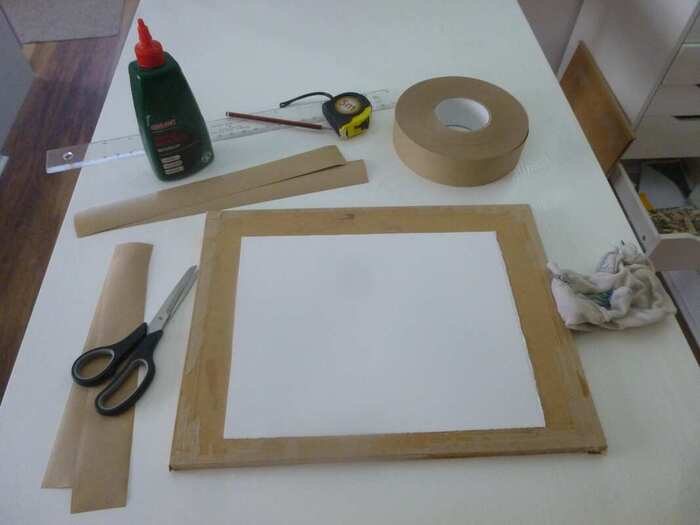
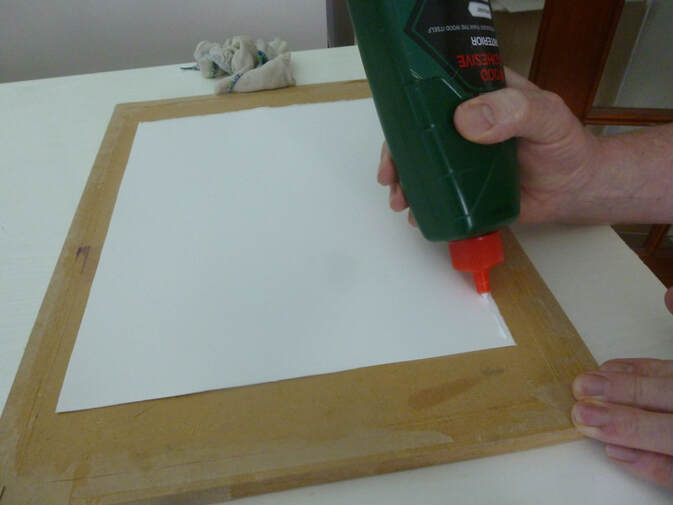
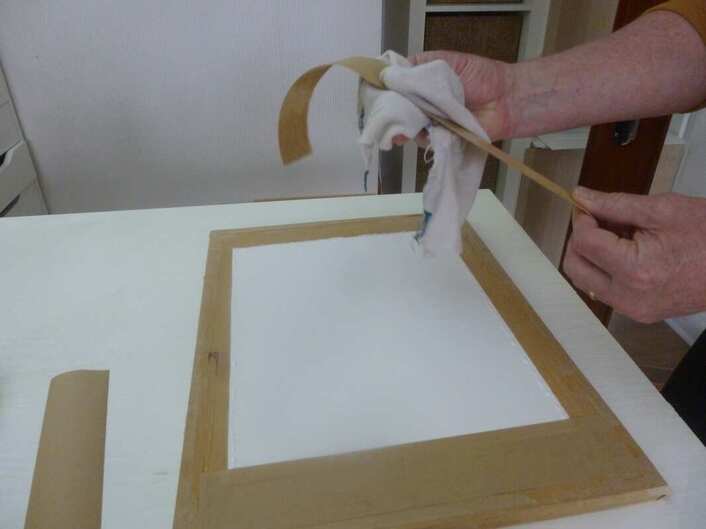
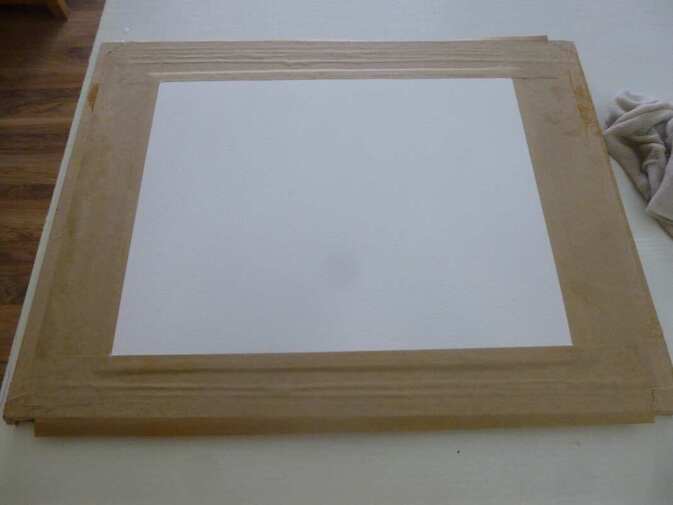
Here's what you need. You need a painting board which is stiff. I use 1/2" (12.5 mm) MDF boards but you can also use thick plywood boards if you like. You can pay for an artist's drawing board if you're feeling flush - but you can get a lot of painting boards out of a sheet of MDF for not much money. The key is that it is thick enough to resist bending when wet. You also want some gummed brown tape of about an inch or more width - the type you get wet to stick down. Lastly, you need some white woodworker's glue - PVA glue, the type you'll find in a hardware shop. Here's the theory: dry paper will try to expand when it gets wet (as it does as you paint), which is the cause of the buckling up. If we can get that expansion out of the way before you paint, it won't happen again. So we're going to get the paper wet, let it expand, then fasten it down by its edges as it dries. The paper won't be able to contract again, leaving it 'pre-stretched' ready for you to get it wet again without curling up! So how to do it? First off, throw it in a sink or, if it's a bigger piece, in your bath. Then leave it there for half an hour or so. The aim is to get it really wet, so don't mess about with 30 seconds or a minute - throw it in, then go and think about getting the rest of the stuff together. Or have a cup of tea. Just don't hurry! Just one thing - make sure it's the right way up, so you can remember later - some papers are only 'sized' (coated ready to receive paint) on one side, so it's as well to make sure it's the right way up from the start. That means that it's the way up it was in a pad or, if it's a sheet of paper, the opposite side to the watermark indentations. When you have all your equipment ready, and the time is up, it's time to remove the paper. Lay it on a fabric towel and gently and quickly remove the excess water - you want to remove the drops but not the water within. Lay it on the board, the right way up. Now, squeeze a thin line of PVA glue all around the edge of the paper, staying as close to the edge as you can. To be clear, the glue is going on top of the paper, not on the board. Just keep it as close to the edges as you can. You see, the problem is, that gummed paper isn't what it used to be. Back in the day, it would be strong enough to hold the paper to the board as it dried. These days it's not up to the job. The glue will help the gummed paper hold the paper to the board - the glue dries as the paper does, and holds on. Once you have a thin bead all around the edge of the paper, moisten the gummed tape and stick the paper down at the edges with it, covering over that thin film of glue at the edges. Because of the glue, you don't need a huge overlap; just enough to cover the glued area. The glue will try to squeeze out from the tape edges, and you can't afford to get the glue on the area you want to paint on, so start with a reasonable overlap (maybe 10 mm or 3/8") and you can maybe thin it down in future when you're well practised. (The glue acts as a permanent seal which won't let paint through - it'll stay as a white spot on the paper to the end of the painting if it gets on the paper). If any glue does threaten to get onto the paper you want to paint on, wipe it away with clean kitchen roll, swing outwards away from the paper. You'll be left with this: You can now just leave this to dry in a horizontal position. I recommend overnight, so pre-plan the paper you want to paint on. You'll also find it useful to have a few boards and to stretch paper in a 'production line' to do a few pieces at a time. The next day you'll find a taut, smooth and oh-so inviting piece of paper waiting for you. Better still, it'll help you paint by staying flat when you get it wet when you paint!
I stretch every bit of paper I use (Actually I use cotton rag 'paper' but everything is exactly the same). I use 300 lb heavyweight paper for my largest paintings - and I stretch that too. I paint very wet, and although this thick paper doesn't curl up without stretching, it does try to 'bow' along its length. Stretching it first stops that. If you don't want to do this procedure, you can use watercolour 'blocks', where the edges are gummed together. These are a 'half-way house', stopping the paper curling up as much when you paint on it, but in my opinion still not a substitute for proper stretching. So let me repeat my plea from earlier: please don't paint watercolour - don't even try it! - without stretching the paper first. You'll enjoy it so much more, and what's more, you'll be much more likely to succeed. Have fun on your lovely, flat and taut paper! If you've found this article helpful, or if you have any questions, please let me know. Maybe it'll tempt me to write more stuff on techniques! Cheers, Rob.
2 Comments
Elaine
27/5/2023 04:58:38 pm
Thanks for this very informative post. I'm looking forward to trying this out. It was great meeting you & your wife today in Elgin. I'm going to hang your lovely print in my study for inspiration.
Reply
John Luckwell
31/1/2024 04:41:44 pm
Rob, thank you for pointing me to your blog ... very interesting indeed! I have done a few pencil sketches but never put paint to paper, so I am now fired up to give it a go. However, I don't think you need worry about competition 😁
Reply
Leave a Reply. |
AuthorA professional artist living and working in the beautiful north of Scotland. My work is realistic and quite traditional, though strongly interpretational in nature. My inspiration is the beauty of Nature, and the wonderful colours and moods she shows everywhere. Archives
April 2022
Categories |


 RSS Feed